Showing posts with label paint. Show all posts

Wednesday, November 2, 2011

October 13: Sietsma's Orchards and Jar-O-Lanterns


Mmmmm...donuts and cider!
This was our first (but not last) visit to Sietsema Orchards and Cider Mill.  We go to church with the third-generation Sietsemas and wanted to visit their newly opened store and pick some apples to eat and make applesauce.  Our friend, Andy, surprised us with delicious donuts and cider for the kids -- they were ecstatic!  The trip could have ended there for them. :)  But we grabbed some bags and headed out into the orchard with Andy's directions as to what to pick and where to find the trees we needed: Cameos to eat and a combination of Jonogolds and Northern Spies for applesauce. 
Koen heard "Spy" and he was immediately interested.  The only spies he knows are on Cars 2 and he was excited to learn there was a Spy Apple!  Even though we picked them to make applesauce, he insisted on only eating Spies because, "This is the tastiest apple I have EVER eaten!"  I think I need to make everything related to Cars or some other movie/story/book he's interested in...do you think he'd go for Radiator Springs Roasted Chicken or Mater's Potaters?  ;)


Hanging out on the hay bales in the store at Sietsemas.
 After we picked our apples and purchased some cider we were off for home again. 

Koen had this day and the next off from school for the Christian School Teachers Convention, so he got to participate in our project for the day:  Jar-O-Lanterns!  I saw this idea in the October 2011 issue of Family Fun magazine and knew the kids would enjoy it! 

Begin with a glass jar.  Cut masking tape in basic shapes to create jack-o-lantern faces.  We used a lot of triangles, squares, and rectangles.  Place the tape on the outside of the jar to create a face.  Then paint the entire outside of the jar with orange paint.  The instructions from the magazine suggested acrylic, but I didn't have any so we just used orange craft paint from Target.  Wait for the paint to dry and carefully remove the tape.  Viola!  Your jar-o-lantern!  The magazine said to use a battery-operated tea light, but again, I didn't have any, so we used the good-old-fashioned votive candle and just set them on the counter for us to see and not touch. 


October 7: Color Changing Milk

This science activity originally comes from the Steve Spangler Website, but it's no longer posted.  It is very cool, though, so here's what you do.  Take a plate and pour milk to fill it.  Drip one drop of a few different colors of food coloring in the middle of the milk.  Try to keep the drops fairly close together.  Take a q-tip and dip it in the middle of the colors to see what happens (do NOT stir it).  Then put a drop of dish soap on the q-tip and place it in the middle of the colors again (for 10-15 seconds) and watch what happens.  Ty and Brielle were both excited about the movement of colors!  You can repeat that last step and place the q-tip elsewhere in the milk and watch what happens. 

Food coloring drops in milk.

Food coloring reacting to the soap in milk.

So what makes the food coloring move? 
     "Milk is mostly water but contains some vitamins, minerals, proteins, and tiny droplets of fat suspended in 
     solution.  Fats and proteins are sensitive to changes in the surrounding solution (milk)."  (Steve Spangler)

Apparently, the soap molecules weaken the chemical bonds in the milk's fats and proteins and then the soap molecules "chase" the fat molecules to connect them them.  I didn't explain all this to Ty and Brielle...maybe someday.

We decided to try this same experiment with food coloring in water.  I didn't expect much to happen based on the Steve Spangler website's information, but I was wrong.  It wasn't as dramatic as when it was in the milk, but still fun!
Food coloring in water.

Food coloring reacting to the soap.


Ty wanted to try something else for an experiment, so I pulled out the water color paint books and told the kids to see what happened when they painted with water.  They spent the next 30 minutes painting with water!  So fun!

Sunday, October 23, 2011

October 6: Ty Plans the Project


I had a project planned for today, but Ty declared that he was going to paint a dinosaur today.  Far be it from me to get in the way of his creativity, so "dinosaurs" it was!  He probably spent more time painting his pictures than he would have on my suggested project, and I'm sure he enjoyed it more since it was his idea!
Dino #1
Dino #2

Tuesday, August 9, 2011

July 29: Painted Butterflies

It seems that it's been a while since we've done a project.  I picked up these butterfly suncatchers at Michael's a long time ago.  They'd been sitting on the counter for a couple of days and the boys finally decided it was time to paint them.  They had a great time with them!  The butterflies came with pink, purple, and yellow paint, and Koen mixed the pink and yellow for some orange.  We taped them to our slider door after they had dried and admired the boys's beautiful work!  Unfortunately, the purple disappeared after one day!  Slowly, the colors have faded which has been disappointing for the kids, but the project itself was great!

Sunday, July 3, 2011

June 15: Paper Toss and Painting

I found this Paper Toss Game and thought it might be fun for the kids to play.  I glued six toilet paper rolls together in a triangle shape and then crumpled up some paper into little balls.  I gave the boys the paper balls and told them to try to toss them into the toilet paper tubes.  If they were a bit older we could have done different points for each tube, but I just wanted them to have fun tossing the ball into the tubes. 

Koen's first attempt wasn't so much a toss as a shot, so it bounced off the edge and landed on the floor.  Frustrated, Koen decided he was done after one turn.  Unfortunately for him, I made him try it again.  After adjusting his technique, he did get a few in which improved his mood somewhat.  Tysen found it worked best to stand right next to the tubes to drop the paper balls into the tubes.  He had great fun with this game.  Even Brielle got in on the fun!  She'd crawl after the balls that didn't make it into the tubes and crawl back to put them in herself.  She was so proud of being so helpful!

Later in the day, Ty asked if he could paint handprint fish (described in a previous post), so we pulled out the paint and let the boys paint.  It was the best part of the day for all of us! :) 

Sunday, June 12, 2011

June 10: Caterpillers and Fish

Ty announced that he wanted to make TWO  projects today...so that's what we did.  He was in the mood to paint!!!  We began by making these great fish!  I found the idea HERE at Ramblings of a Crazy Woman.  Tysen started out by using a paint brush but decided it would just be easier to use his hands to put the paint on the back of the plat.  He enjoyed smearing the colors together!  We let the plates dry for a while, and then I cut out a wedge for the mouth and then stapled the cut out wedge to the other side of the plate to create a tail.  Super cute and super simple!  Ty added a googly eye and they were finished! 

And then it was time for the Cup Caterpillars from I Can Teach My Child.  When I showed Ty what we were going to do he told me he wanted to make The Very Hungry Caterpillar (from Eric Carle).  When I asked him what The Very Hungry Caterpillar looked like he knew that it had a red head and a green body, so that's what he did!  We used small Styrofoam cups to paint the circles and then a fork to paint the grass.  But Ty wasn't finished painting yet...he decided to paint each of the green circles of the caterpillars, and he did a really nice job!  You can see in the pictures how focused Tysen was...he was so serious about both projects.  I wondered aloud what else we could make with circles.  I decided to try a flower, and Ty thought I should make a sunflower...then he tried one, too!


Two completed caterpillars.
My sunflower.
Ty's sunflower.


And I just had to include this last picture of Brielle doing her newest "trick".  She'll just stop whatever she's doing and "stand" on her head.  Then giggle!  I see yoga in her future. :)

Friday, May 20, 2011

May 20: Pudding Paint

I got the idea for this fabulous project HERE.  The boys thought this was the BEST project!  Koen had a fever last night so he stayed home from school, though he seemed to be fine today.  He was excited to be a part of this.  Paint you can eat?  Too cool! 

All you need is a box of instant vanilla pudding, some food coloring, and a space to paint your picture.  We made 4 colors...all from the "neon" box of food coloring:  blue, green, pink, and purple.  I gave each of the boys a glass 9x13 pan to paint in, and Brielle even got into it! I wondered if they'd just eat the pudding out of the bowls, but they actually did paint designs...and then they ate it!  We spent 30 minutes playing with this paint...a great amount of time in my opinion.  The neighbor girls stopped over, too, and enjoyed playing with the pudding paint.  My guess is they'll be asking to do this one again! 

Here are the pictures to give you a sense of the fun!

 Getting started...


Having fun!


Friday, April 15, 2011

April 8: Painting Projects


A friend of mine had shared a recipe for puffy paint with me a few weeks ago.  I'd kind of forgotten about it, but in searching for another idea for a project I came across this same idea:  equal parts of shaving cream and Elmer's glue.  Messy?  Yes!  It went pretty well, though (and it smells good too!).  I used 1/4 cup of each and it made plenty.  I made three batches -- white, red, and green (just a few drops of food coloring).  These were Ty's choices...apparently he's got Christmas on his mind! :) After a while, Ty got sick of his color choices, so we made the red into purple and that got him interested again.  

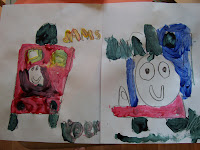
Koen decided not to use the puffy paint.  Instead, he drew his own pictures and painted them. 

Monday, January 17, 2011

January 12: Polar Bears!

Messy fun!
Getting the hand full of paint.


Making the print.
We pushed our project day up a few days since I'm going to be gone on Friday.  It worked out that Koen was home from school by the time we got to work on our project, so he got to participate, too! 

Last week, we made footprint penguins, and after we finished that Ty asked to make polar bears next.  I didn't have the materials ready, but I'd seen an example of a handprint polar bear on the Handprint and Footprint Art website, so I'd promised Ty we'd make polar bears this week.  Unfortunately, I didn't take the time to review the website post before we did the project, so we missed a few details, but they still turned out pretty cute. 


I made the first one, showing the boys what to do.  Both boys surprised me by smearing their hands in the paint with no hesitation.  They both made a white handprint on blue paper.  After washing hands, Ty said, "Let's make a black bear!" so the black paint came out and we smeared our hands in black paint.  Ty and Koen were ready to make blue, red, and green bears next, but it was time to get ready for bed so we simply left our papers on the table to dry. 


Koen's polar bear.

Ty's black bear.

The next morning, I double-checked the website so I would know how to draw all the details on the handprint to make it look like a bear.  It was at that time I realized I'd missed using their fingerprints to make ears and a tail, but we managed to finish our bears anyway.  We used a thin-tip permanent marker to draw on the bear claws, ears, eyes, nose, and mouth. 
They boys really enjoyed painting with their hand, and I have a feeling you'll be seeing more handprint and footprint projects in the future! 

Adding the details.